Aquariums & Supplies

 Coral Reef Aquariums & Supplies

 Garden & Hydroponics & Landscape

 Ponds & Fountains & Waterfalls

 Drum Pond Filter

 Community

 Help Center
A Beginner's Guide to Reef Aquarium Aquascaping
A Beginner's Guide to Reef Aquarium Aquascaping
Starting a reef aquarium is seen as a very difficult process by many. And while it is true that there are quite a few things to learn to get started, the process isn't as intensive as it may seem once you get the basics down.
Starting a reef aquarium, AND learning to aquascape? Don't get worried with all of the details and techniques to keep track of, we're here to help!
The Materials
We're going to assume you have at least a rough idea of the basics of starting a reef aquarium. If not, please check out our other blogs on getting started with setting up a coral reef aquarium. The materials you're going to need in this process are as follows:
- A table/space to make a mess
- A hammer
- A screwdriver (flathead preferable)
- Protective glasses
- Reef safe glue
- Sanding paper
- Aquarium dry rock, live rock, or manufactured rock
- Aquarium sand (if you choose to have a rock & sand aquascape)
- An aquarium to place your aquascape in
The Rocks
With starting a reef aquarium, it is typically recommended to start your tank with a type of dry rock, manufactured rock, or live rock. Dry rock and live rock are rocks pulled from the ocean that harbor the beneficial bacteria necessary for making your home aquarium a habitable environment for fish and corals. They are a core component to cycling your tank and completing the nitrogen cycle to make your aquarium fish-ready.
Which of these three types of rock to use is dependent on your exact goals. Each has their pros and cons. Live rock, for instance, is great for getting a reef system started quicker, as they are kept in water after being pulled from the ocean so that bacteria and micro-life are able to stay alive. This usually results in a much quicker tank cycling process. Live rock does have its downsides as well. It is usually much more expensive than its dry and manufactured rock counterparts, as the methods of gathering, storing, and shipping are more costly. There is also a chance you can get unwanted hitchhikers in the live rock you receive, animals that may be detrimental to the overall health of your reef tank. For aquascaping purposes, it is usually more difficult to aquascape with live rock as they are shipped in water, and need to be kept moist to not lose the benefits of having your more active bacteria and micro-life die.
For creating your own custom aquascape, dry rock and manufactured rock offer the most ease and versatility. Dry rock is similar to live rock in how they are sourced, with the difference of they are allowed to dry out. You lose out on a lot of the benefits of having more active life on the rock, but you can still use dry rock to cycle your tank. And because it is sold dry, you'll have a much easier time breaking and putting rock pieces back together in your desired configuration. Manufactured rock are made by companies out of various reef-friendly materials to take the place of dry and live rock. They are designed to be similar in structure to their dry & live counterparts so that they have the surface area to effectively hold beneficial bacteria, as well as place corals when you reach that point. Another added benefit of going with manufactured rock is that they are often sold in pre-made aquscape structures. If you want the looks of an artistically crafted aquascape without putting in the effort required to make one, manufactured rock may be the solution for you. Using manufactured rock will require you to purchase additional supplies, such as a bacteria starter kit to get your tank properly cycled. You may find that your tank cycling process is longer as well, though results will always vary.
For this guide, we're going to be focusing on aquascaping with dry rock and manufactured rock. While some of the same principles will apply for live rock, there are different techniques that need to be followed with aquascaping for live rock. Live rock also generally doesn't allow for the same sculpting freedom that dry and manufactured rock do. The amount of rock you should get is also dependent on the size of your tank, and your own aquascaping aspirations. Always make sure to plan ahead, and be prepared to buy a fair bit of rock if you're aquascaping for a bigger tank.
The Sand
While sand may be considered by some to be a vital part of any reef aquarium aquascape, there is a growing movement of having a no-sand aquascape that relies on the structure of the rock setup for visual appeal. One thing to note with the sandless reef setup is that you may have a more difficult time with your tank cycling process as beneficial bacteria utilizes the surface area of the sand. Some types of fish and other animals, such as snails and crabs, also rely on sand. So keep that in mind as you're planning out your aquascape and aquarium livestock.
There are many types of aquarium sand, with differences ranging from the inclusion beneficial bacteria to the size of the sand granules. There is more to go into with sand than we are able to cover in this guide, so do your own research, and stay tuned for our in depth guide on choosing aquarium sand.
The Sculpting Process
Now it's time to bring out your inner sculptor. Prepare your workspace and get ready to get messy. Layout your pieces either in your tank or on your table and try to visualize what kinds of structures you might want, and what sort of pieces may be necessary to fit it all together. The process of aquascaping and breaking down your rocks is actually quite simple. Though there are a few techniques that can help with being more precise.
Use your hammer to take off bigger pieces of your rock. Don't be afraid to use some force with your swings. Using your hammer directly on the rock is good for breaking your rock apart into workable pieces. However, you may find that your rock may break apart in ways you did not intend with the hammer. If you have a rock that you like and just want to chip away a particular section, this is where utilizing your screwdriver will help. You may have already noticed your rock is fairly porous. A good method to more precisely chipping away smaller pieces of your rock is to use your screwdriver and hammer to attack the connecting bits of rock inbetween the holes of the specific area you wish to remove.
Putting rock pieces together into more interesting shapes is a bit of a freeflow creative process. Utilize the more precision technique of chipping rock away, and also sandpaper to help rock pieces fit together more seamlessly. You want as much touching surface area as possible between the connecting rock pieces. Once you're able to fit your rocks together in a way that works, you can begin to glue them together. There are many brands of reef-safe glue or epoxy you can purchase. There are also general use glue brands that are reef safe that you may already have laying around at home. Gorilla glue is a common one used among reefers. However, if it's not explicitly sold as an aquarium safe glue, please do your research on whether or not it would actually be safe to put into your reef environment. When it comes to rock joining and glue placement, prioritize stability over looks. You don't want your structures toppling over and potentially harming your animals. Ensure that the surface area of each connecting piece that are directly touching are glued well. You should also place some glue around the small crevices of these connecting bits. Use your screwdriver, or a thin tool to help spread the glue around. Depending on the glue you use, the setting process may take a while.
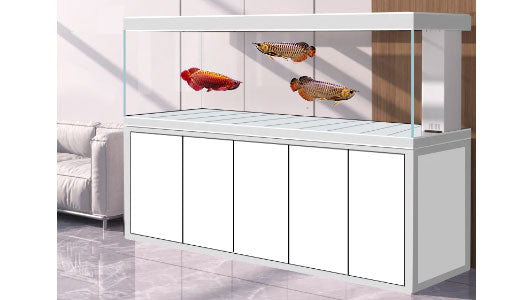
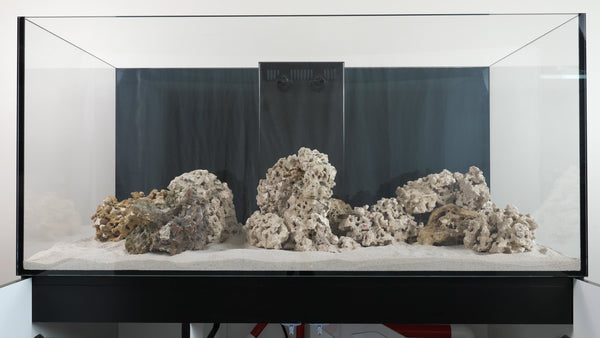
When placing your aquascape into the tank, it is recommended to place your rocks first directly onto the tank glass, and then place your sand. The logic behind this is that you don't want stability of your rockscape to be dependent on the sand surrounding it. Through water movement, or animal actions, your sand is prone to moving around, and you don't want your rockscape toppling over and potentially harming your animals. Our AquaDream tanks are specifically designed to be scratch resistant, so if you aquascape with one of our tanks, you don't need to be as worried about your aquascaping scratching up your tank.
And there you go! You've now got down the basics of aquascaping for a coral reef aquarium. There are much more techniques, methodologies, and schools of thought for aquascaping. As far as basics go, this guide will be enough to get you started. So bring out your inner artist, and make a great aquascape you and your fish will enjoy.