

 Acuarios y suministros

 Acuarios y suministros para arrecifes de coral

 Jardín, hidroponía y paisajismo

 Estanques, fuentes y cascadas

 Filtro de tambor para estanque

 Comunidad

 Centro de ayuda

Why Is My Protein Skimmer Not Foaming? 7 Fixes
Table of Contents
- Start Here: A Symptom-Based Troubleshooting Path
- Protein Skimmer Not Making Bubbles? Check Air Intake, Airline, and Venturi First
- Pump, Impeller, and Water Flow: When the Skimmer Body Stays Flat
- Protein Skimmer Water Level Adjustment and Sump Depth
- The New Protein Skimmer Break-In Period (and How to Tell It From a Fault)
- How to Clean a Protein Skimmer: Maintenance That Restores Foam
- Water Chemistry, Additives, and Habits That Kill Foam
- When to Repair or Replace the Pump or Skimmer
- Frequently Asked Questions
Last Updated: October 18, 2026
Start Here: A Symptom-Based Troubleshooting Path
A protein skimmer not foaming usually comes down to four things: no air into the pump, blocked water flow, wrong water level, or water chemistry that won't hold a bubble.
No bubbles at all in the body. The pump moves water but no air enters.
Bubbles climb but the cup stays empty. Foam is too dry. Open the outlet valve slightly and wait a day.
Foam collapsed suddenly after weeks of working. Something changed the water: check additives, hands in the tank, or a feeding switch.
Work down that list in order; most problems get solved at step one or two.
No Bubbles at All vs. Bubbles That Never Reach the Cup
These symptoms look similar but shouldn't be treated the same way. No bubbles means the air path is closed. Bubbles that never reach the cup means the air path is open but the water column or foam level is wrong. Fixing the wrong one wastes an afternoon.
Protein Skimmer Not Making Bubbles? Check Air Intake, Airline, and Venturi First
A protein skimmer not making bubbles points to a blocked air path nine times out of ten. Salt creep, dried calcium, and dust narrow the air intake while the pump runs quietly and produces no foam.
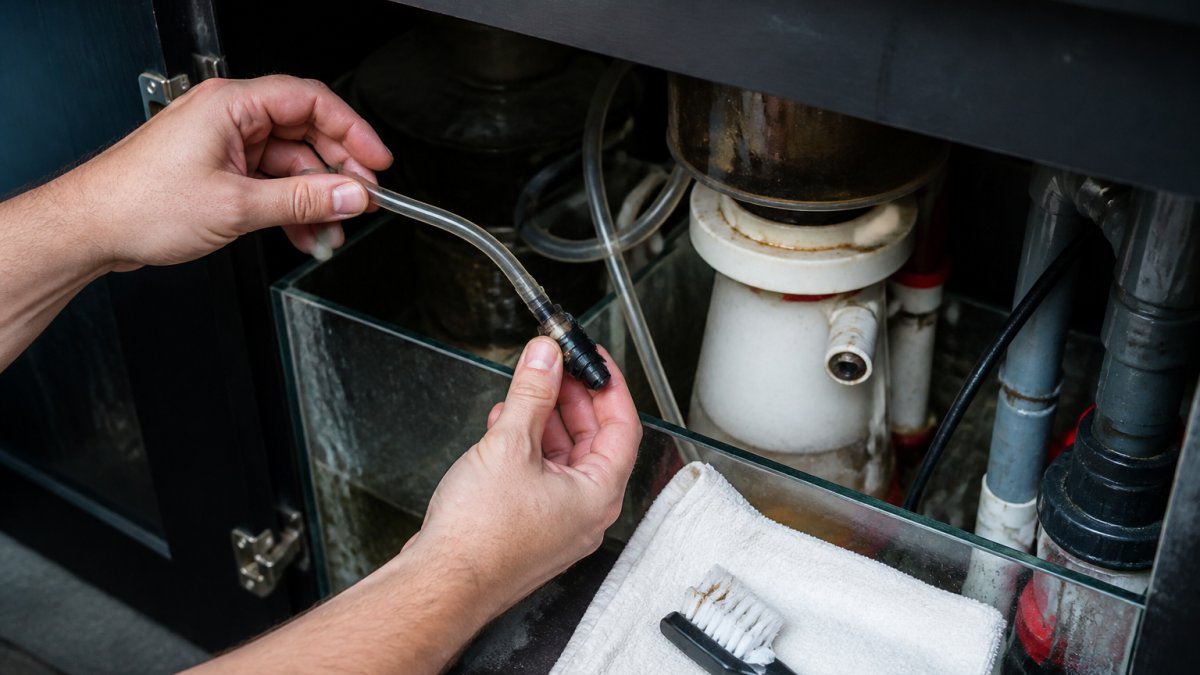
Check them in this order:
- Air intake port: look for salt crust or a spider web across the opening
- Airline: disconnect both ends and check for water trapped inside
- Silencer: confirm it isn't flooded or blocked
A common mistake is replacing the pump when the airline is simply full of salt. Pull the line first. It costs nothing to check.
A Systematic Air-Intake and Venturi Cleaning Procedure
Do this once, properly, and you'll know whether the air path was the problem.
- Unplug the pump. Never work on a skimmer with power running to it.
- Pull the airline from both the silencer and the venturi.
- Run warm water through the line. If water won't pass, the line is clogged. Replace it.
- Soak the venturi fitting in warm water for fifteen minutes. A 50/50 mix of water and white vinegar works faster on calcium.
- Push a soft brush or pipe cleaner through the air hole. Never use a wire or drill bit, which can enlarge the opening and ruin the air draw.
- Rinse everything and reassemble dry.
- Restart and watch the bubble column for two minutes.
If bubbles return, you found it. If nothing changes, move to the pump.
Pump, Impeller, and Water Flow: When the Skimmer Body Stays Flat
A flat skimmer body with a running pump usually means the impeller is worn, jammed, or coated. The needle wheel impeller chops water into fine bubbles, and its needles wear down or bind with calcium over months of service.
Check these:
- Impeller spins freely by hand with the pump off
- Needles are intact and not worn flat
- No calcium scale on the magnet or the impeller well
Low water flow through the skimmer body also kills foam: less flow means less contact time and lower bubble density. Clean the impeller well with a soft brush and vinegar, then reassemble.
Protein Skimmer Water Level Adjustment and Sump Depth
Water level is the second most common reason a protein skimmer stops foaming, and most hobbyists adjust it by feel instead of measurement. Every skimmer has a recommended operating depth, and running outside it changes both how much air the pump draws and where the foam sits.
Why Sump Depth Changes Foam, Not Just Water Height
An in-sump skimmer's pump is fixed-speed, so the depth it sits in sets the back pressure and head height it pushes against. Too shallow and the pump can cavitate or draw air unevenly, producing large, weak bubbles that pop before they climb. Too deep and water flow through the body drops, thinning the bubble column. Neither failure looks like a broken part, which is why depth problems get misdiagnosed as pump problems.
How to Measure Your Actual Sump Depth
- Turn the skimmer off so the sump settles to its true operating height.
- Measure from the sump floor to the water surface with a ruler, not from the skimmer's base if it sits on a stand.
- Compare that number to the manual's range and write both down.
- Note the level with the return pump running, since the sump often drops when the display is circulating.
If your depth is inside the range, move to the outlet valve. If it is outside, fix the depth first.
Raising or Lowering the Skimmer to Hit Spec
- Sump too deep: build a 1-2 inch stand from egg crate or acrylic sheet; egg crate lets water flow under the skimmer so it doesn't create a dead zone.
- Sump too shallow: raise the level in that compartment with a small baffle, or move the skimmer to a deeper compartment. Don't just add water to the whole sump if that pushes the display level up.
- Level the skimmer: a crooked skimmer foams unevenly because the internal water line is higher on one side. Check it with a spirit level first.
Setting the Foam Level With the Outlet or Drain Valve
Once depth is correct, the outlet valve sets where the foam sits. The target zone for most skimmers is the lower half of the neck.
- Foam too low or dry: close the valve slightly to raise the internal water line.
- Foam overflowing the cup: open the valve to lower the internal water line.
Make one small adjustment, then wait several hours before adjusting again. Skimmers respond slowly, and chasing the setting every ten minutes guarantees you will overshoot.
EPA guidance on aquarium and aquatic system water quality is a useful reference for understanding what is actually in your water before you blame the skimmer.
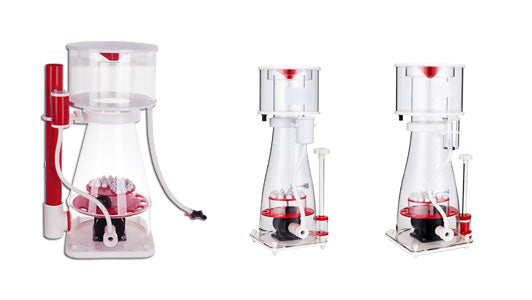
Protein Skimmer 200-500 Gal Ocean Coral Reef Fish Saltwater Aquarium Pump →
The New Protein Skimmer Break-In Period (and How to Tell It From a Fault)
A new protein skimmer break-in period is normal and usually lasts a few days to a couple of weeks. Manufacturing residue on the plastic means the skimmer may produce nothing, weak foam, or constant overflow.
Here's how to tell break-in from a real fault:
| Signal | Normal Break-In | Actual Fault |
|---|---|---|
| Bubbles in body | Present, may be fine or coarse | None at all |
| Foam in cup | Erratic, may overflow then stop | Consistently dry and empty |
| Pump sound | Steady hum | Rattle, buzz, or silence |
| Duration | Improves within 1-2 weeks | No change after 2 weeks |
| Air draw at intake | Strong suction | Weak or none |
Strong air draw plus bubbles in the body means it's breaking in, leave it alone. Constant fiddling during break-in is the most common reason people conclude a new skimmer "doesn't work." No air draw at all isn't break-in; go back to the air intake section.
How to Clean a Protein Skimmer: Maintenance That Restores Foam
Knowing how to clean a protein skimmer properly keeps foam production consistent. Most no-foam problems are maintenance problems in disguise.
Clean these parts on this schedule:
- Collection cup: every 3-7 days, rinse with warm water
- Skimmer neck: weekly, wipe the buildup off the inner wall
- Airline and silencer: monthly, flush with warm water
The neck is the part people skip. A dirty neck narrows the passage foam climbs through, so foam collapses before reaching the cup. Wiping it takes thirty seconds and solves a surprising number of "my skimmer stopped foaming" complaints.
Water Chemistry, Additives, and Habits That Kill Foam
Water condition can shut down foam production even when every part of the skimmer works perfectly. Foam depends on dissolved organics collecting at each bubble's surface, and anything that changes surface tension changes whether bubbles hold long enough to climb into the cup. Proteins and other organics are amphiphilic, one water-loving end, one water-repelling end, and line up at the bubble wall to stabilize foam.
Common Culprits and What Each One Does
- Water conditioners and additives that contain surfactants, polymers, or aloe: these directly alter surface tension and are the most common single cause of a sudden foam collapse.
- Hands in the aquarium: skin oils and lotions are potent foam killers. A single arm in the tank can shut down foam for hours.
- Oily or heavy foods: feeding right before you check the skimmer makes it look broken when it is just working through a fat load.
The flip side matters too. A lightly stocked tank, or one running heavy mechanical filtration, may simply not have enough dissolved waste to produce much foam. That is not a fault. A skimmer on a clean tank has little to remove, and a skimmer that foams hard on a clean tank is usually set too wet.
How to Confirm a Water-Chemistry Cause
Use timing, not a test kit. Most water-chemistry foam failures follow a change within 24 to 48 hours: a dose, a feeding, a water change, a new sock, or hands in the tank. If foam collapsed on that timeline and the air path and pump check out, treat the water before touching the equipment. To confirm, pull a cup of tank water, add a drop of the suspect additive, and shake it, if the foam collapses faster than a control cup, you've found your culprit.
Recovery Protocol
- Stop the suspect additive and dose nothing else for a week.
- Run fresh activated carbon for several days to pull surfactants and oils out.
- Keep hands out of the tank and move air fresheners and sprays away from the sump.
- Leave the skimmer setting alone, cranking the valve while the water is off means you'll overshoot when foam returns.
- Give it about a week. Foam usually returns once the surfactant clears.
If foam doesn't return after a week of carbon and no additives, the cause probably isn't water chemistry, go back to the air-path and pump checks.
NOAA's aquarium and aquatic invasive species resources offers useful background on managing aquarium water conditions responsibly.
When to Repair or Replace the Pump or Skimmer
Replace the pump when the impeller is worn beyond cleaning, the motor rattles after a full breakdown, or it won't restart reliably.
Our recommendation: match the skimmer to your actual water volume with some headroom. The FDA consumer guidance on aquarium equipment safety is worth a read if you're setting up a new system.
For most reef setups, the AquaDreamUSA C7 Plus handles 200-500 gallons with a honeycomb bubble plate that produces a steady flow of fine bubbles and a large collection cup with cross-shaped drainage.

American Chemical Society resources on water chemistry can help if you want to understand what's driving your organic load.
Frequently Asked Questions
Why is my protein skimmer not producing foam even after cleaning it?
Cleaning fixes a clogged air intake or blocked venturi, but a protein skimmer not foaming after a clean usually points to water level or water condition. Confirm the skimmer body sits at the depth the manufacturer specifies, then open the outlet valve and watch the bubble column for ten minutes. If bubbles form but never climb, the sump depth is wrong. If the bubble column collapses entirely, check the impeller for wear and look at recent additives, epoxy, or hand-in-tank activity, all of which suppress foam for a day or two.
How long does it take to break in a new protein skimmer?
Most new skimmers need 24 to 72 hours before they hold a stable foam head, and some take up to a week. During the break-in period, the skimmer body and pump parts still carry manufacturing residue that changes how bubbles behave. Run the skimmer continuously, keep your hands out of the tank, and resist the urge to adjust the outlet valve every few hours. If the cup is still dry after seven days of correct water level and a clean air line, treat it as a fault rather than a slow break-in.
Can water level or sump depth affect foam production?
Yes, and it is the most common cause of a skimmer that bubbles but never fills the cup. Every model has a recommended water height, and running the skimmer body deeper or shallower than that changes the pressure inside the reaction chamber. Protein skimmer water level adjustment happens in two places: the physical depth of the skimmer in the sump, and the outlet regulation valve that sets the foam level. Move one at a time, wait an hour, and watch the collection cup before changing anything else.
Why does my protein skimmer stop skimming after a few days?
A skimmer that works, then quits, usually has a partial clog in the airline or venturi, or a collection cup that has filled and is pushing wet foam back down. Pull the air tube and check for salt creep, then inspect the venturi intake for debris. Also review what changed: a new batch of additives, epoxy putty, filter socks, or a feeding switch can all suppress foam for days. Cleaning the air path and restoring the correct water level resolves most of these cases without replacing parts.
If your skimmer still won't foam after working through this list, the problem is usually a mismatch between the skimmer and the system, not a broken part. AquaDreamUSA has built reef and saltwater filtration equipment since 1999, and our protein skimmers ship with the honeycomb bubble plate, needle brush pump, outlet regulation valve, and external silencer that make tuning predictable. Get started with AquaDreamUSA and match your skimmer to your tank the first time.